Moodboards for product photography: What to include and how to use them in lifestyle shots
- Nov 17, 2025
- 5 min read
When organizing a lifestyle product photography session, the goal is not just to showcase an object in the foreground. What truly connects with the audience is the story surrounding it: the emotion it evokes, the lifestyle it represents, and the context in which it fits.

And this is where a fundamental tool comes into play: the moodboard. This visual board helps you transform an abstract idea into a concrete, clear plan shared by everyone involved in the session.
INDEX:
1. What is a moodboard and what is it for?
A moodboard is a board (digital or physical) where you gather images, references, colors, keywords, and examples that define the creative direction of a project.

In product photography, it works like a visual compass. Its main functions are:
Aligning the vision: ensuring that the client, photographer, and creative team understand and share the same idea before starting.
Guiding aesthetic decisions: from the background to the props, as well as lighting and angles.
Communicating clearly: often words are not enough to describe an atmosphere, but an image says it all.
Imagine your moodboard as a visual map: it saves you doubts, prevents costly mistakes, and keeps you focused on the goal.
2. Why is it so important in lifestyle photography?
In lifestyle photography, it’s not enough to simply show the product isolated on a white background. What makes the difference is showing it in action, integrated into a context that evokes emotions and real-life situations.
If you want to learn more about what lifestyle photography is, you can read: Lifestyle Photography vs. Product Photography for Catalogs: When to Use Each.

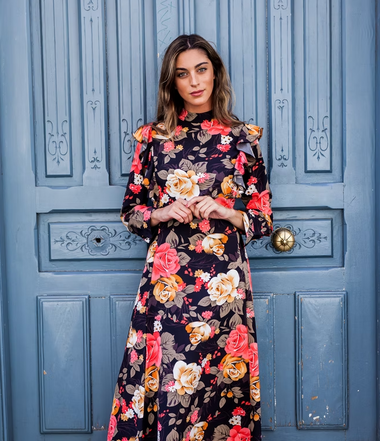


If you’re selling a mug, it’s not just the object: it’s the experience of a hot coffee on a cold morning, with a blanket and soft light coming through the window.
If you’re photographing headphones, it’s not just cables or a design: it’s the feeling of freedom while someone runs in a park or relaxes at home listening to music.
The moodboard helps define and convey that story before the camera even clicks. This way, the whole team understands that it’s not just about lighting a product, but about building a coherent visual narrative.
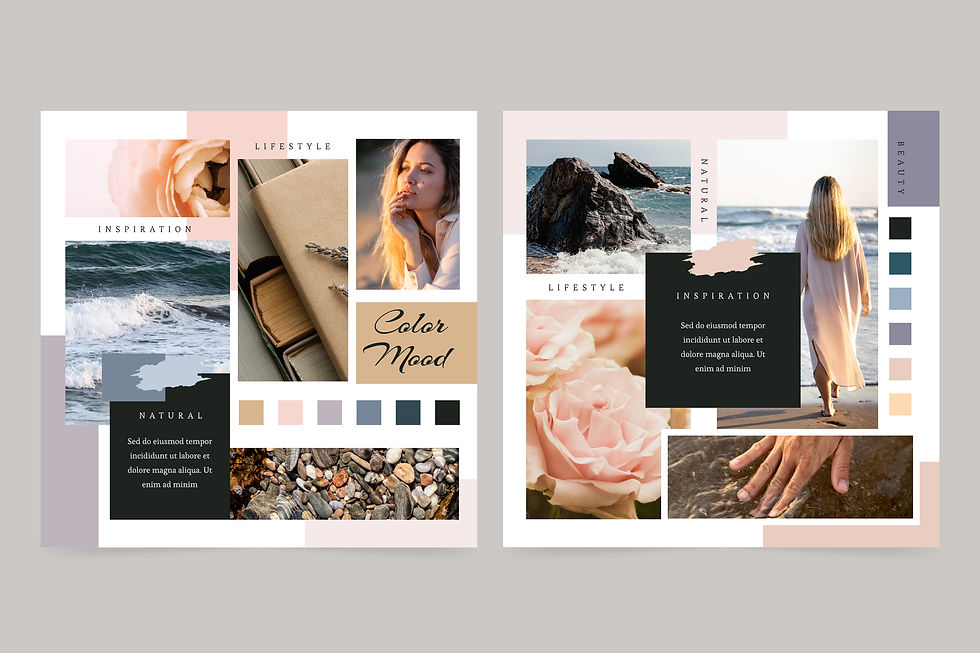
3. What should a moodboard include
A well-made moodboard is not a random collage. It should gather concrete elements that guide the session. The most important are:
Color palette: Defines the main and secondary tones. For example, for a skincare product, you might use neutral tones, beige, and whites that convey purity and freshness.
Lighting style: Do you want warm natural light at sunset? Or hard, dramatic studio lighting? The choice will define the character of your photos.
Types of framing and compositions: Examples of close-ups, wide shots, overhead perspectives, or minimalist compositions.
Props and supporting elements: Objects, fabrics, flowers, books, food… anything that complements the product and reinforces the lifestyle you want to show.
Visual context: Modern interiors, natural settings, urban spaces, etc.
Message or emotion to convey: Well-being, energy, calm, luxury, simplicity, closeness…

4. Clear visual references
The images you include in your moodboard are not meant to be copied, but to inspire. They can come from campaigns of other brands, social media, magazines, movies, or even illustrations.
What matters is that they are concrete and easy to interpret. A photo of a sunrise can indicate the color temperature you’re aiming for; a scene from a series can inspire the emotional atmosphere.
The clearer the references, the easier it will be to replicate the idea during the session.
5. Keywords and concepts
Accompany the images with keywords that reinforce the creative direction. These words serve as a quick reminder of what you want to convey and help avoid ambiguities.
Examples:
For a fitness product: “energy,” “dynamism,” “overcoming.”
For a kitchen product: “home,” “warmth,” “family moment.”
For a luxury product: “exclusivity,” “elegance,” “sophisticated minimalism.”
Keywords are like tags that summarize your intention in a single phrase.

6. It’s not just decoration
A common mistake is thinking that a moodboard is just a collage of pretty photos. The difference lies in the intention:
Every image must be there for a reason.
Every color or reference has to contribute to the final message.
Nothing should be decorative: everything must be functional for the session’s narrative.
In other words: your moodboard should not be only aesthetic, but strategic.
7. How to use your moodboard in practice
A moodboard doesn’t just stay saved on your computer: it’s actively used at every stage of the process.
Before the session: Share it with the client and your team. Make sure everyone is aligned and asks questions if there are any doubts.
During the session: Keep it handy (printed or on a tablet). If you get lost or don’t know what decision to make, refer back to it to regain direction.
After the session: Use it as a reference for editing and retouching, ensuring you maintain consistency with the atmosphere you defined at the start.
You can even save it as a reference file for future projects, creating a style library that will help you work faster and with greater consistency.
A moodboard is not just a creative whim; it’s a strategic tool for planning and executing lifestyle product photography sessions. It allows you to solidify ideas, communicate your vision, and above all, bring coherence to the images you will produce.
The next time you plan a session, take the time to create your moodboard. You’ll see how everything flows better—from the conversation with the client to the final shot that will make your product not only look good… but tell a story that connects with the audience.
What exactly is a moodboard?
A moodboard is a visual board (digital or physical) where images, colors, references, keywords, and examples are gathered to set the creative direction of a photography project.
Why do I need a moodboard for lifestyle product photography?
Because in lifestyle photography, you’re not just showcasing the product—you’re showing the context, emotions, and story around it. A moodboard helps you define that narrative and maintain consistency throughout the entire session.
What tools can I use to create a moodboard?
Canva, Pinterest, Milanote, Photoshop, or Figma.
Can I use images from other brands as references?
Yes, as long as they are used for inspiration, not copying. They can come from campaigns, magazines, movies, or social media. The important thing is that they clearly represent the atmosphere you want to create.
Should I make a different moodboard for each product?
Ideally, create a different moodboard for each product line or collection. This way, you avoid confusion and maintain a coherent visual style for each campaign.
How do I use the moodboard during the photoshoot?
Before: Share it with the client and team to align ideas.
During: Keep it handy to make decisions on set.
After: Refer to it during editing and image selection to maintain consistency.
What should a well-made moodboard include?
Color palette.
Lighting style.
Examples of framing and compositions.
Props and supporting elements.
Visual context.
Keywords and message to convey.


Comments